Want to Hang Pictures in a Stairway? It's Easy with Original Gallery System
Our customers sometimes ask, “can I hang pictures in a stairway using an art hanging system?”
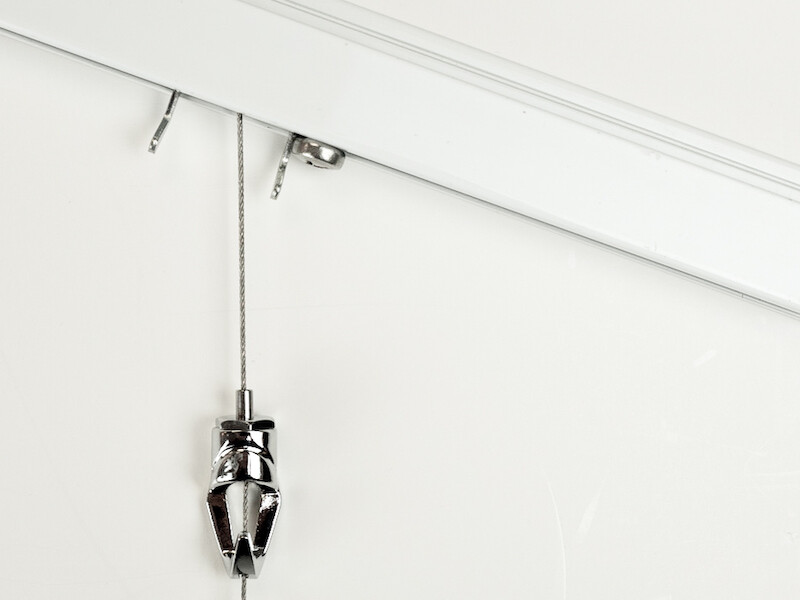
Fortunately, the answer is yes — our Original Gallery System Steel Cable system is an excellent choice for this type of installation. The wall track can be mounted at an angle over stairs, or under a sloped or slanted ceiling, and the addition of a few pieces of simple and inexpensive hardware will keep your artworks securely in place.
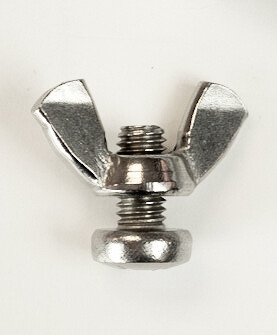
A simple bolt or machine screw fitted with a wing nut can be added to Original Gallery System Steel Cable art hanging systems mounted on an angle (as in stairway installations) to stop hangers from sliding out of position.
Begin by securely mounting the Original Gallery System wall tracks, following our illustrated instructions. No special adjustments are needed for angled mounting but measure carefully so that the tracks are parallel to the ceiling and/or stairs. (Note that only Steel Cable hangers should be used; Clear Tape or Clearline are not recommended, nor are any GalleryOne systems.)
As you select the works you’ll be displaying, keep track of how many hangers you’ll be using. Pieces wider than about 24 inches (60cm) often look and hang better on double hangers and hooks, and doubling up also works well if you’re hanging multiple items on the same hangers in an over-under arrangement.
For each hanger, you’ll need one 1/2-inch machine screw or bolt and one wing nut — the wing nut will sit invisibly inside the wall track, allowing you to snug the bolt in place. This creates a stop that will keep the hanger from sliding out of position.
With its wing nut discreetly hidden inside the wall mounted track, the bolt serves as a discreet stop to keep the Original Gallery System Steel Cable hanger in place in angle-mounted installations as in stairways or under sloping or slanted ceilings.
We recommend using readily available 1/4-20 hardware (1/4 inch diameter, 20 threads per inch). Flat, oval, or round headed bolts will all work, with flat being most discreet.
To install the stops:
• Thread a wing nut onto the end of each bolt, just enough that it stays in place.
• At a point just below the approximate position where your first hanger will be positioned, hold a bolt by the head at an angle to the wall track and guide the wings of the wing nut into the bottom opening of the wall track. Then bring the bolt to a vertical position, and tighten to snug it in place. If you are using doubled hangers, repeat this process at the position of the second hanger.
• You can then insert the Original Gallery System Steel Cable hanger(s) just above the stop(s) and make an initial test hanging of the artworks. If the hanger(s) need to be repositioned, remove the artworks, then loosen the stop(s), shift to the desired location, and retighten. Do not rehang the art before tightening the stop.
• Repeat the process for each additional hanger that will be used.
When making future adjustments to the display area, first remove the artworks. Then loosen the bolts on the stops just enough to allow them to be repositioned. Once done, retighten them, position the hangers, and rehang the art.
As always, the Gallery System support team is ready to provide personal assistance on this or any other aspect of selecting and using our picture hanging systems!